HOW TO CONFIGURE MIKROTIK ROUTER TO RUN JOINMYWIFI MARKETING SOLUTION
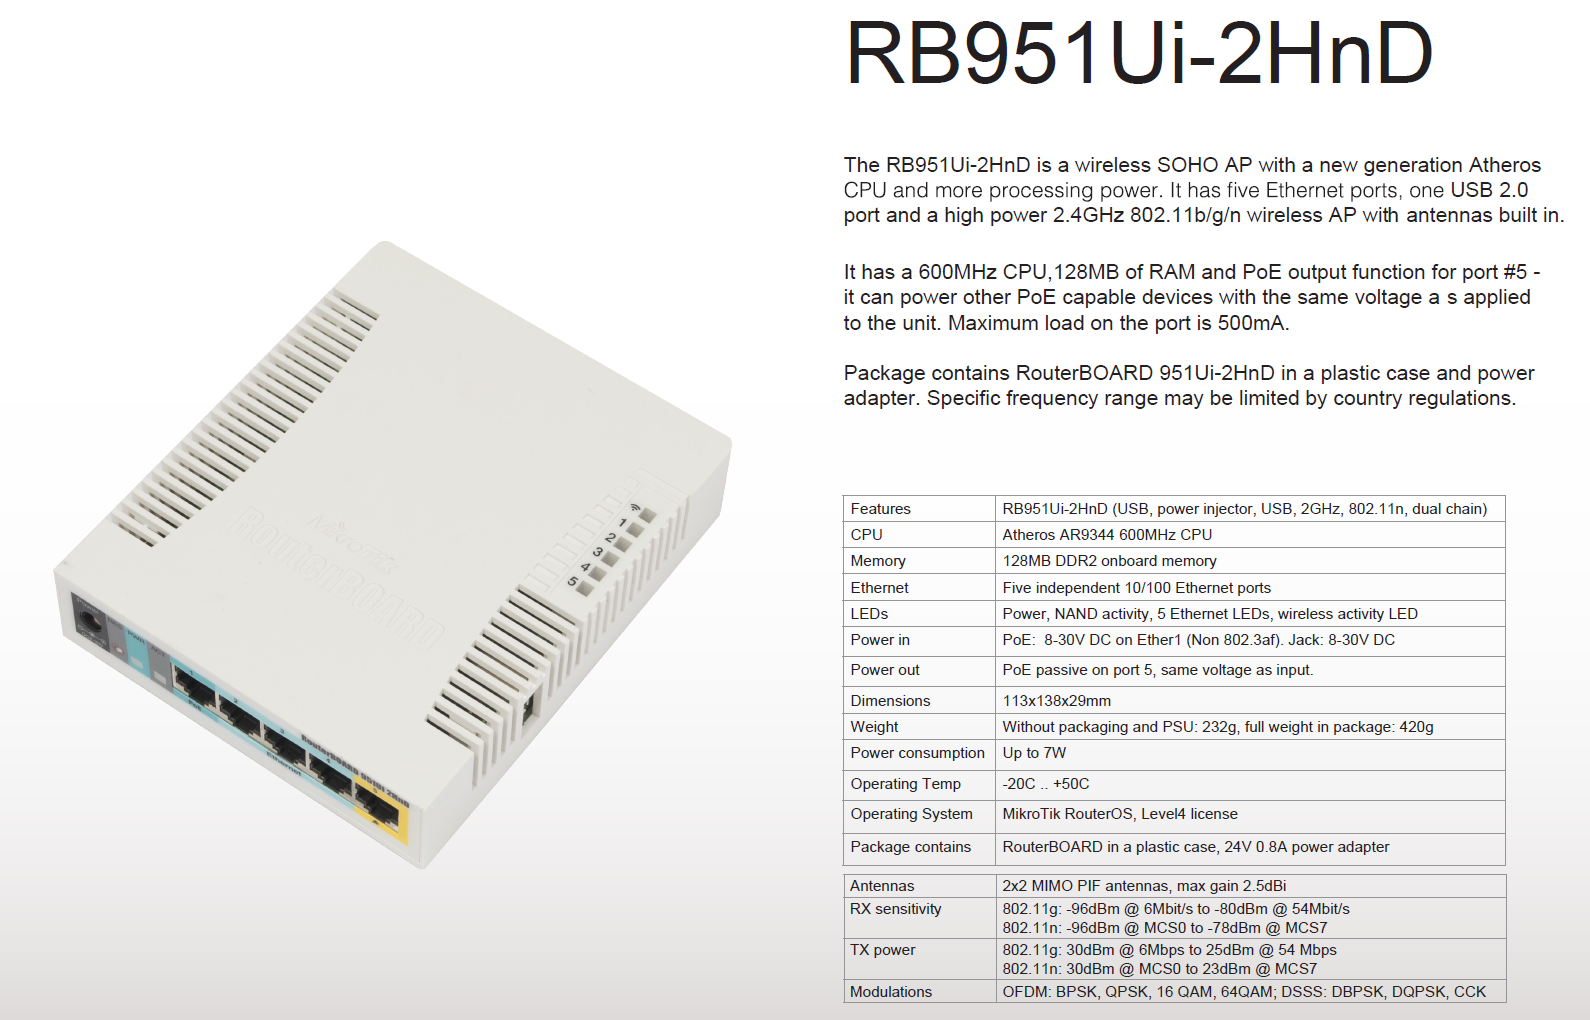
The below configuration was tested on MikroTik RB951Ui-2HnD with RouterOS ver. 6.41.4 and firmware ver. 6.41.4 (13 Apr 2018).
Although the configuration is for RB951Ui-2HnD, with basic knowledge of RouterOS you can execute it on any MikroTik router.
All the needed files and credentials will be provided by JoinMyWifi.
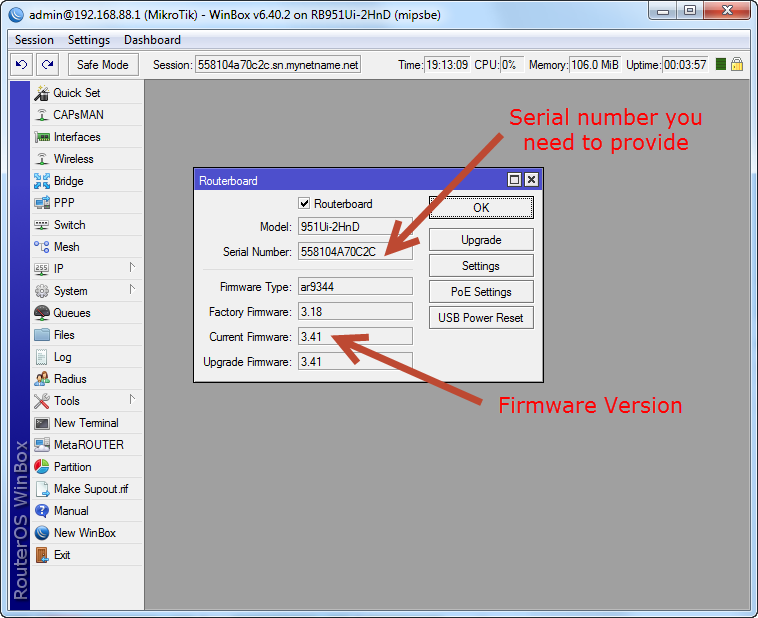
IMPORTANT: You will need to provide us the serial number of the MikroTik otherwise the service to will not work (System->Routerboard->Serial Number).
ROUTER WITH DEFAULT CONFIGURATION:
Assuming that the MikroTik router has the default configuration installed you can follow the steps below. If not, reset the router and will revert back to factory settings with the default configuration.
STEP 1: UPDATE ROUTEROS
#Connect MikroTik to the internet via ethernet1
#Connect your computer with MikroTik via ethernet2
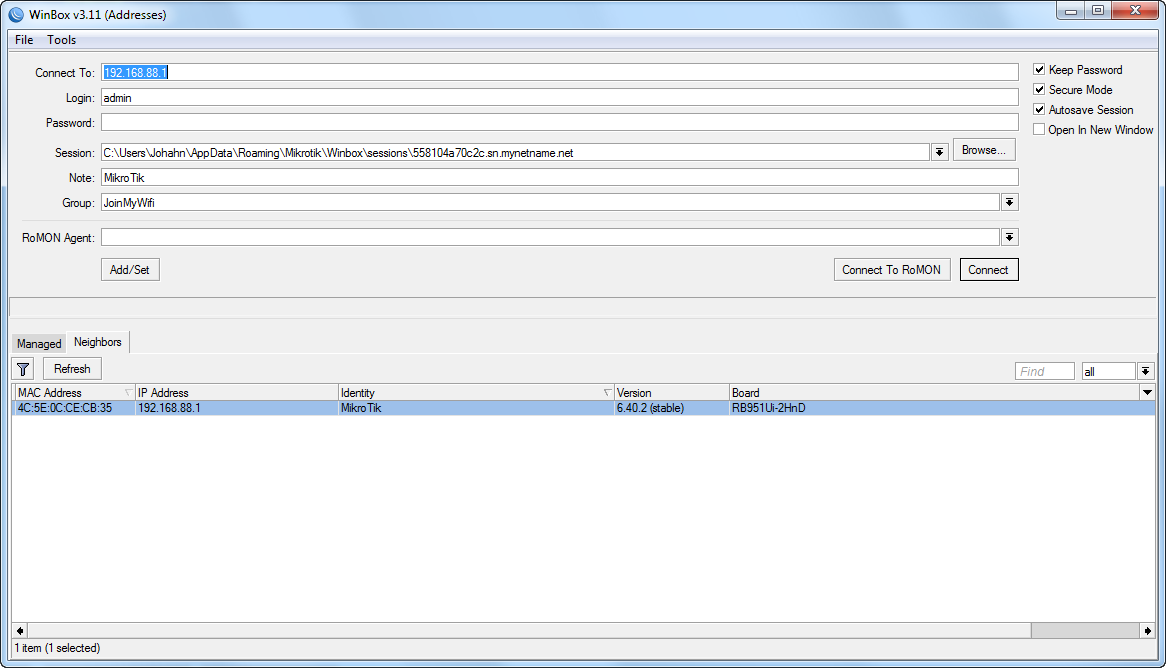
#Use latest WinBox software to connect to the MikroTik using IP(default username:admin/default password:(none))
 #If all is well the Mikrotik will have access to the internet
#Update RouterOS (System->Packages->Check For Updates->Download & Install). It will automatically reboot
STEP 2: UPDATE FIRMWARE/UPLOAD FILES
#Connect to MikroTik using IP
#Update Routerboard (System->Routerboard->Upgrade)
 #Disable mpls and routing packages (System->Packages select packages and click "Disable")
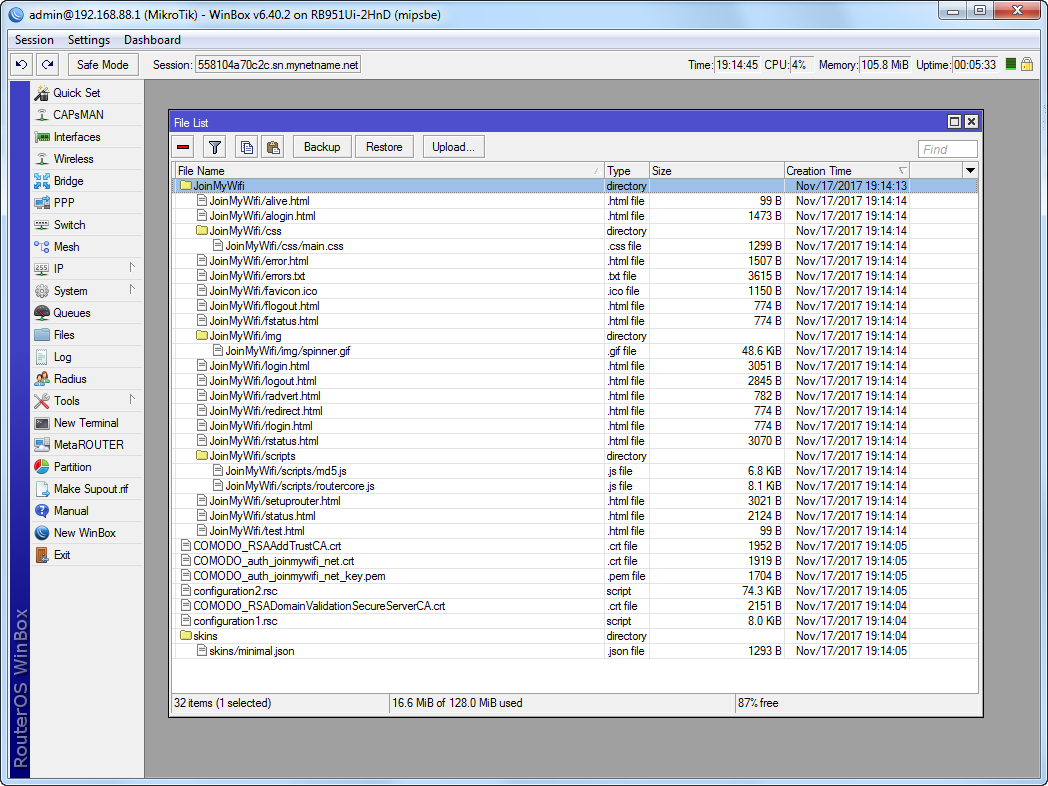
#Put the "HotspotFiles" folder's contents in MikroTik's root folder(File). You can drag and drop files in MikroTik
 #Reset default configuration(System->Reset Configuration->Check "No Default Configuration, Check "Do Not Backup", Click "Reset Configuration"). It will automatically reboot
STEP 3: IMPORT CONFIGURATION
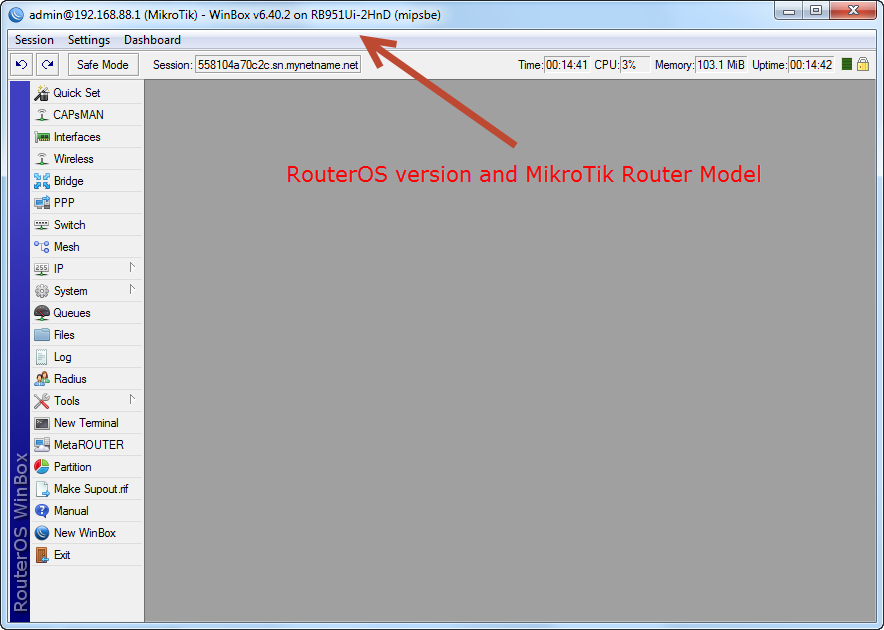
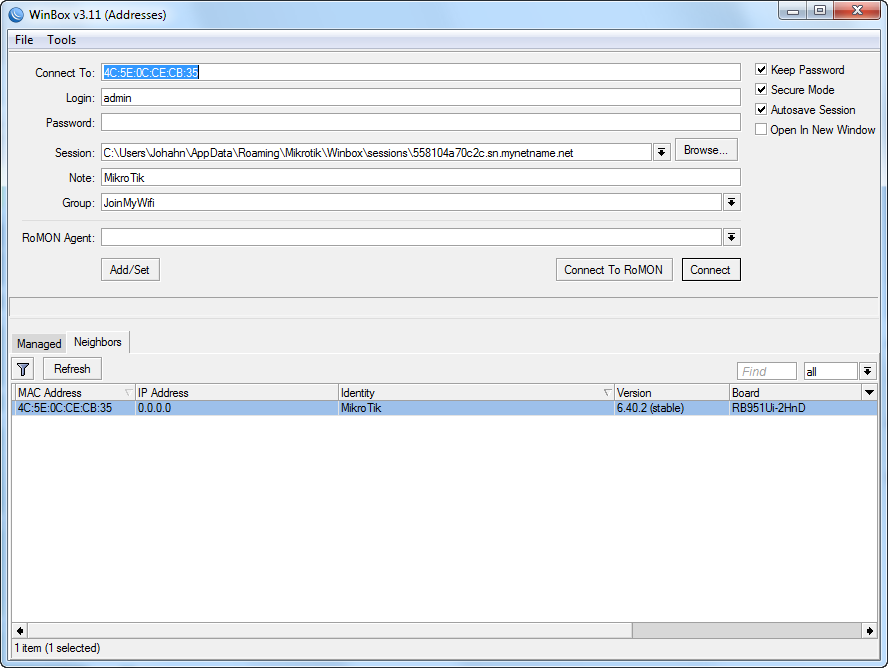
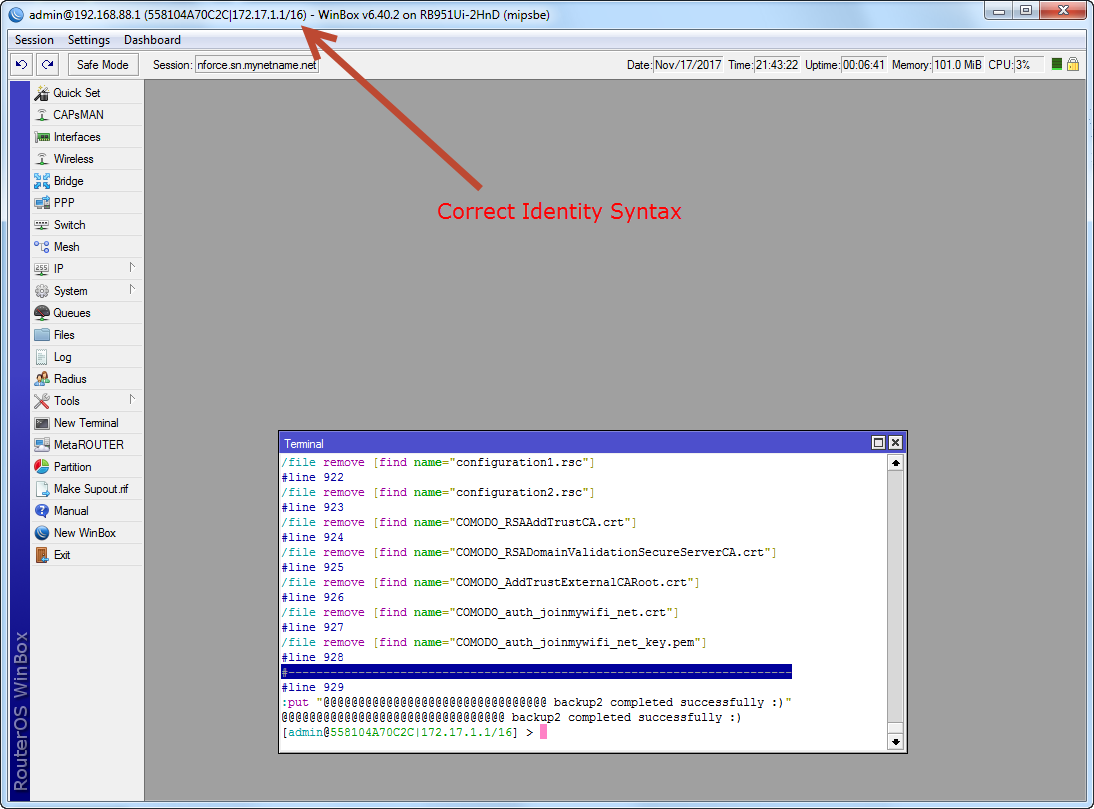
#Connect to the MikroTik using MAC. If at any time you get disconnected, dont worry, it's normal because MAC connection is not very steady. Check if latest RouterOS version (shown in WinBox window at the top) and latest Routerboard firmware installed correctly
 #Run the configuration script. Notes: Ctrl-l clears the terminal's window. Ctrl-v enables disables auto complete (if it is enabled, paste is not working properly) so, always use right click to paste. If you are pasting configuration, beware of any errors in execution (they are easily spoted since they begin at the left side of the terminal). For now we are going to import the configuration. Follow the steps below:
/import verbose=yes configuration1.rsc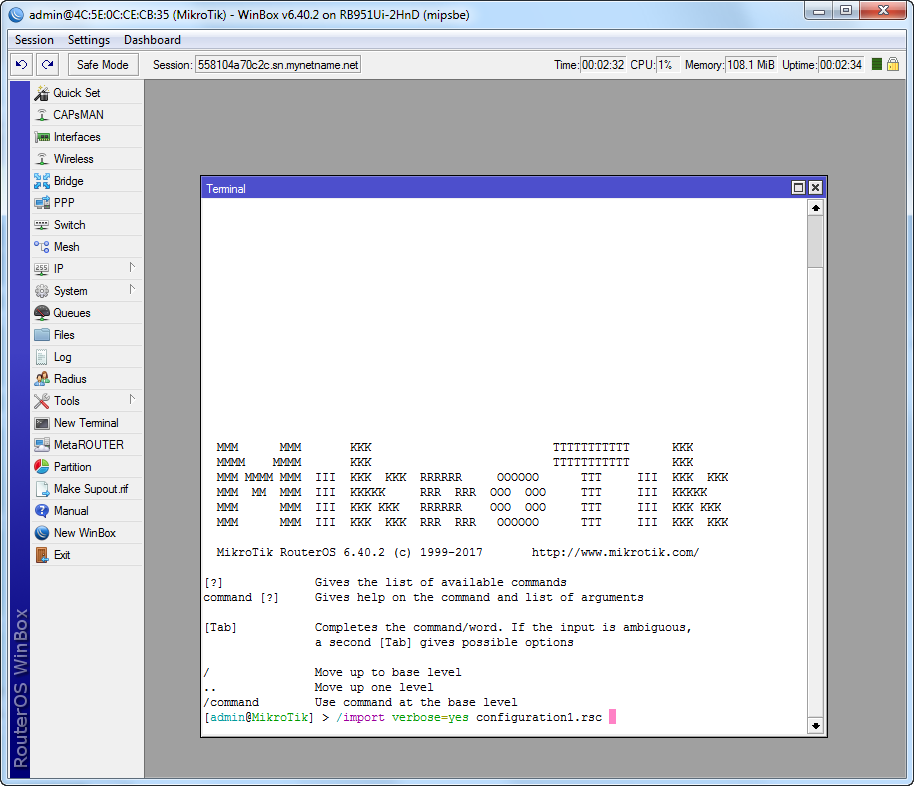
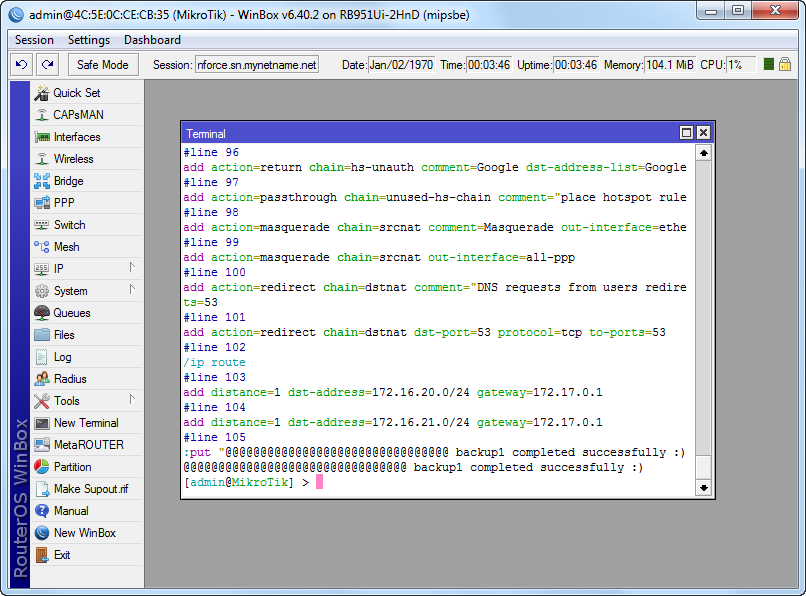
/import verbose=yes configuration2.rsc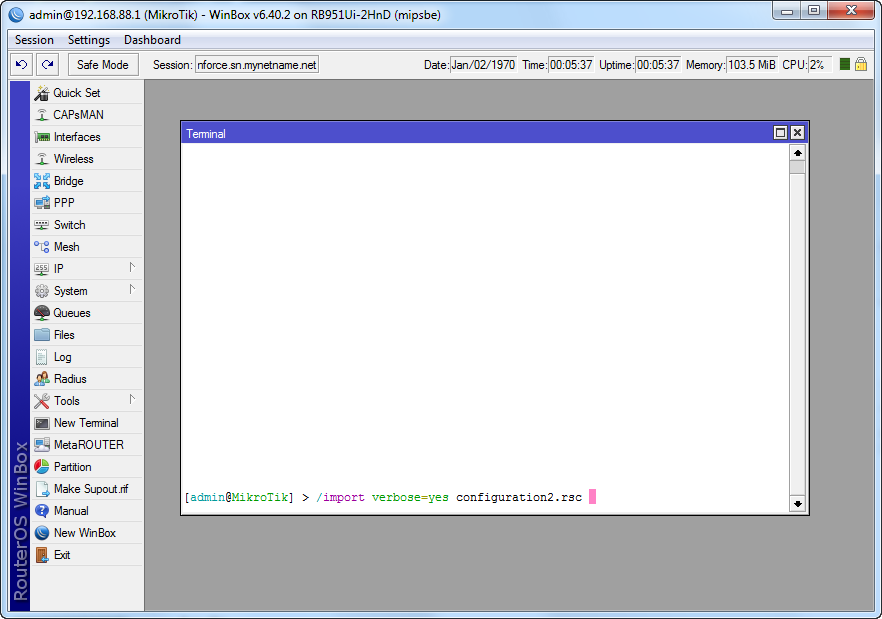
CONFIGURATION COMPLETED: REBOOT AND TEST SERVICE
Possible on-site changes
Enable Wireless->Access Lists and disable "Default Authentication" in Wireless->Interfaces
In case of more than one MikroTik APs in the same area to help roaming
Enable Queues->"PCQ Guests-Staff" and set upload/download max limit accordirg to the bandwidth
Enable Queues->"Limit each Guest-Staff"
In case of more than one MikroTik APs in the same area to eliminate conflict
Enable System->Clock->"Time Zome Autodetect"
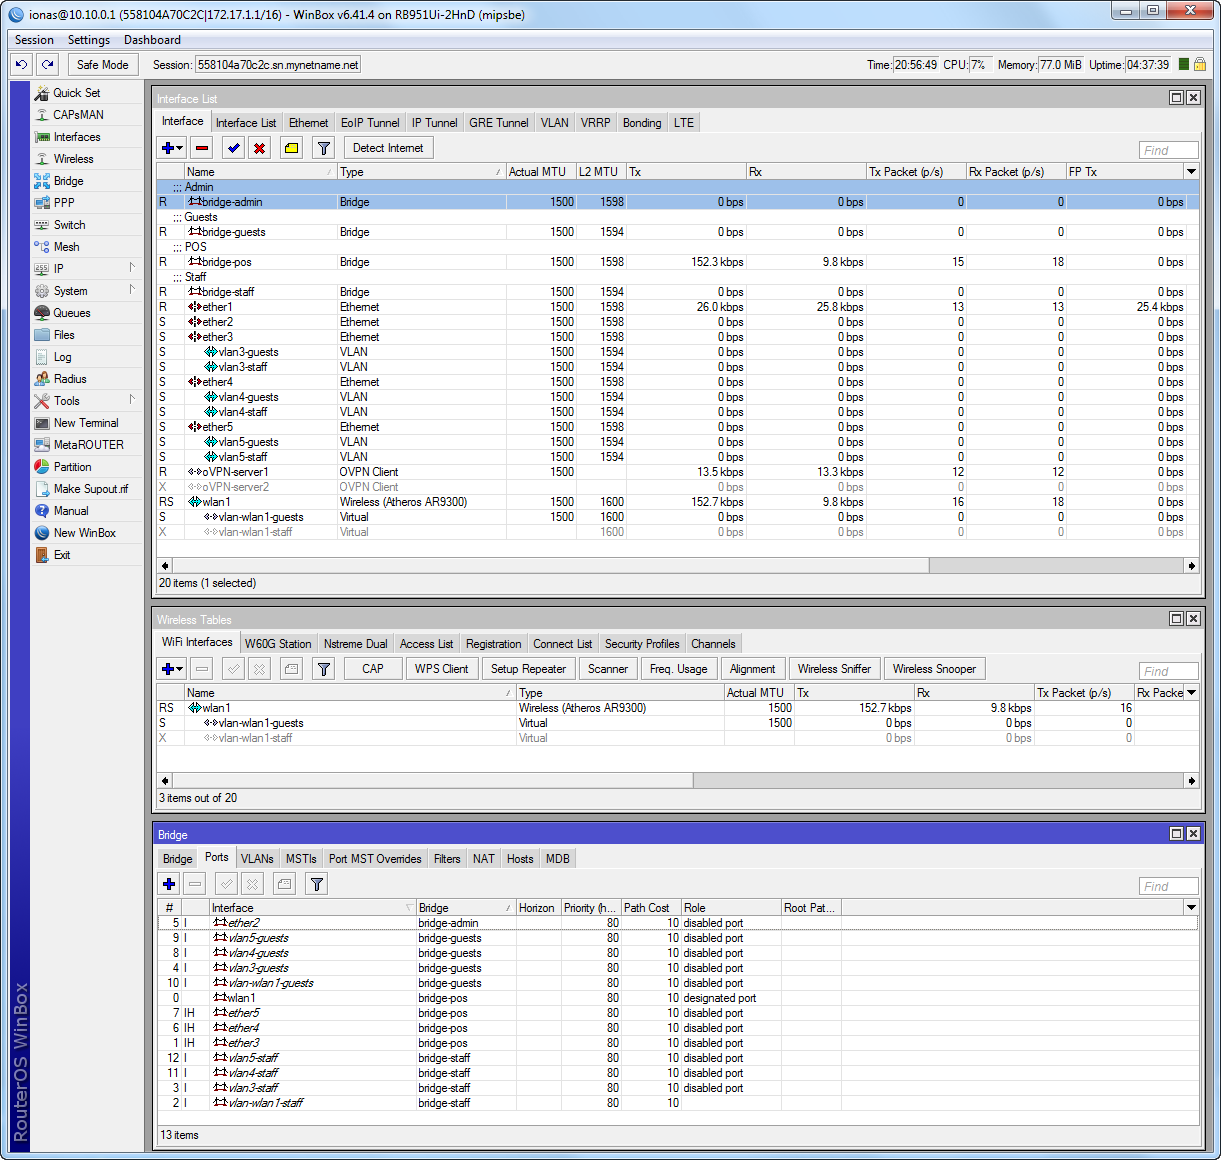
Interfaces descriptions
ether1: WAN port (DHCP client)
bridge-admin: Admin ports (DHCP server 192.168.88.1/24) ->ether2
bridge-pos (DHCP server 10.10.0.1/16): Point of sales network (secure network for cameras/order tablets etc.) ->wlan1 (SSID="JoinMyWifi POS") ->ether3 ->ether4 ->ether5
bridge-staff (DHCP server 10.20.0.1/16): Staff network ->vlan-wlan1-staff: SSID="JoinMyWifi Staff" vlan(ID=20) on wlan1 ->vlan3-staff: vlan(ID=20) on ether3 ->vlan4-staff: vlan(ID=20) on ether4 ->vlan5-staff: vlan(ID=20) on ether5
bridge-guests (DHCP server 10.30.0.1/16): Hotspot users ->vlan-wlan1-guests: SSID="JoinMyWifi Guests (Free)" vlan(ID=30) on wlan1 ->vlan3-guests: vlan(ID=30) on ether3 ->vlan4-guests: vlan(ID=30) on ether4 ->vlan5-guests: vlan(ID=30) on ether5
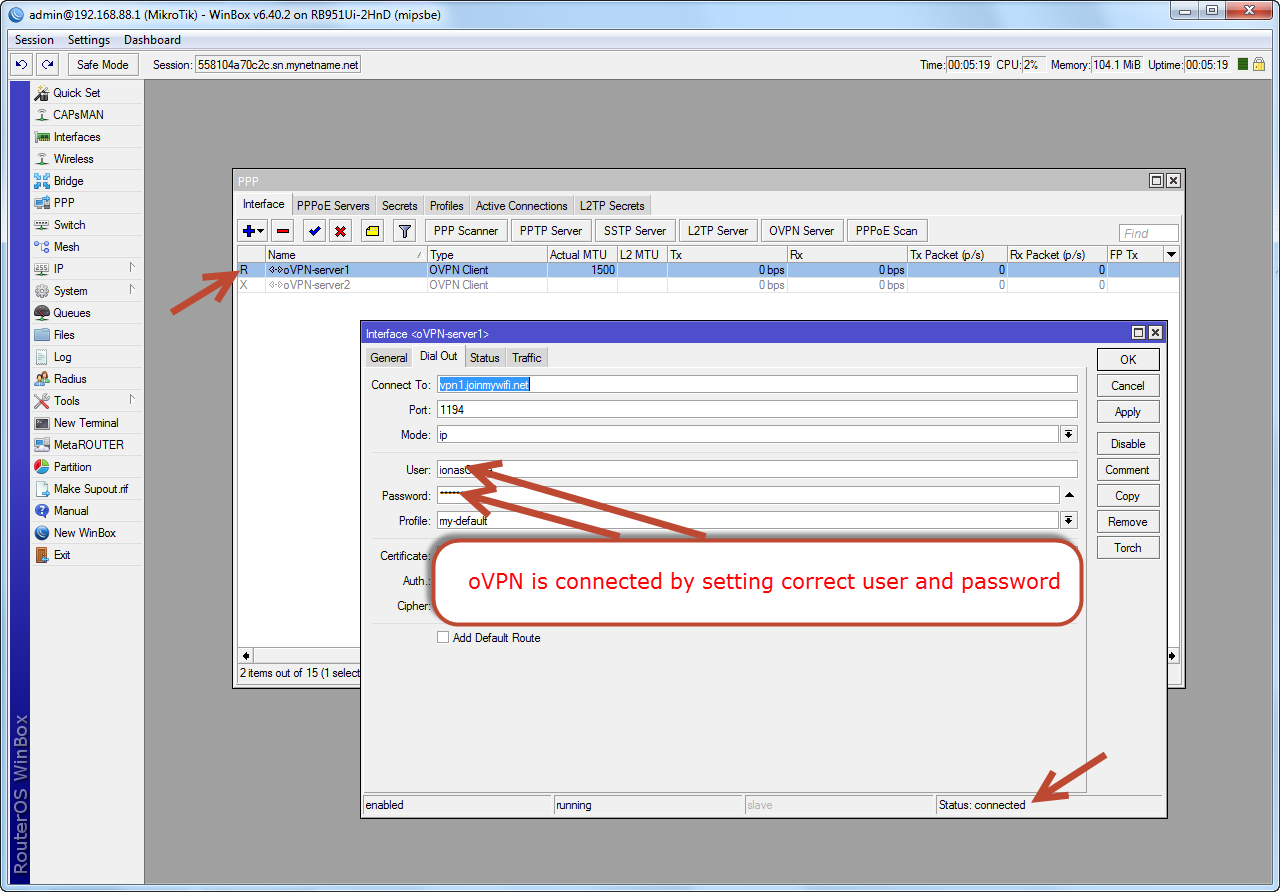
oVPN-server1: oVPN to JoinMyWifi dedicated server (DHCP client from oVPN server 172.17.0.1/16)
ROUTER WITH EXISTING CONFIGURATION:
IMPORTANT: In this case you should ask JoinMyWifi to provide different configuration files.
If your router has existing configuration that you don't want to delete make the following changes:
On the router (before running scripts):- Disable DHCP server and IP address for the bridge used by APs
- Disable existing hotspot server
- Disable dns propagation from DHCP client if any
- Delete rules:
/ip firewall filter add action=passthrough chain=unused-hs-chain comment="place hotspot rules here" disabled=yes
/ip firewall nat add action=passthrough chain=unused-hs-chain comment="place hotspot rules here" disabled=yes
- Move the added rules to the top of their list if are not already there: Firewall filter rules, Firewall nat rules, Hotspot walled-garden rules
- Set timezone in clock
- Check for IP conflicts
- Set srcnat for wan interface
- Set bridge ports for hotpost
More information at MikroTik official website
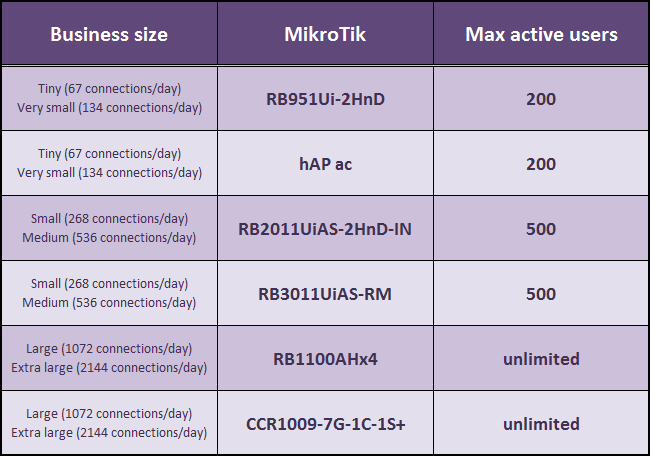
Select appropriate MikroTik router according to the table below